
Without formulas, Google Sheets would be the same as a paper ledger. Formulas allow you to write a set of instructions for a calculation.
All formulas begin with an = sign. Once you type the =, Google Sheets expects a formula to follow. There are several ways to proceed with your formula. Listed below are the different types of items that you can add next.
Get your copy of the spreadsheet containing the examples below.
Contents
Video Tutorial

Parts of a Formula
A formula contains many different parts. Each formula contains at least one of these parts. We will expand on each type below.
Functions
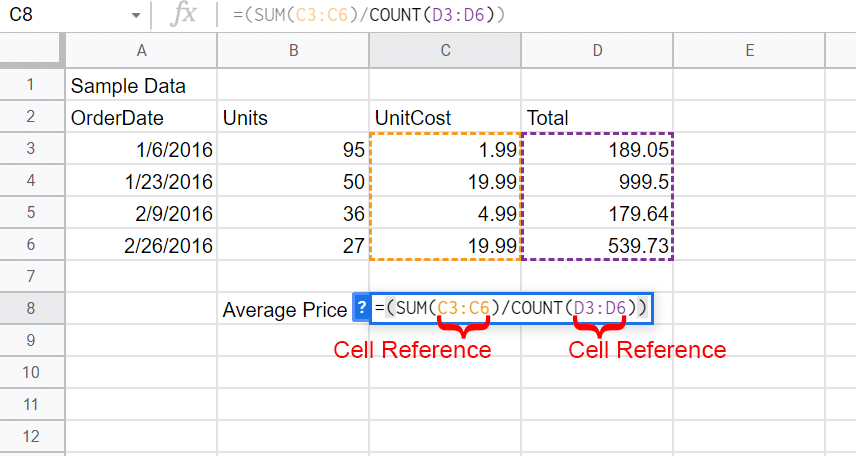
Functions are self-contained sets of instructions. For example, we use the SUM and COUNT functions in the image below to calculate an average.

Formulas are flexible and there are many ways to arrive at the same outcome. We could simplify the formula by using the AVERAGE function as such: =AVERAGE(C3:C6).
Functions need a set of parenthesis after the function name, typically filled with inputs for the function to perform its calculation. For the SUM function above, the input is the cell range of C3:C6. These inputs, also called arguments, can be optional or required, and there can be zero, one, or more than one of them.
A list of suggestions appears as you type. As you continue to type, the list of functions gets smaller. If you see the function you want, click it for automatic completion. If you also want the cell reference that Google Sheets suggests, Google Sheets can finish the formula for you by pressing tab.

If you continue typing until you enter the first parenthesis, the function suggestion will help with the selected function, including its syntax and an example for reference. If you need more information, click the “Learn more” link near the bottom of the help box to open a complete article.

Inserting Functions Through the Menus
Every function in Google Sheets is also accessible through the menus. Go to the Insert menu, then choose Function. Using this menu is slower than typing, but it can be helpful if you are unsure which function you need.

Cell References
In Google Sheets, cell references tell a formula where its data is. They come in several forms, which we discuss in more detail here.
Operators
Operators tell your formula what type of operation to perform. There are several types of operators.
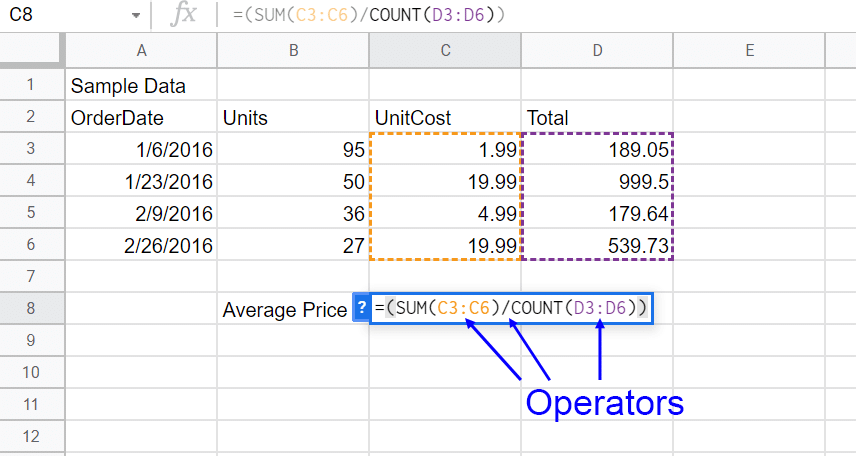
Arithmetic Operators
Operators that perform basic math are called arithmetic operators. They are +,-,*,/ along with % to turn a number into a percent and ^ for exponents.
Comparison Operators
Next are the comparison operators. These operators allow you to analyze two values. The result is TRUE or FALSE. The options are =,>,<,>=,<=, and <>. <> represents not equal to.
Concatenation Operators
The third is the ampersand (&), the only concatenation operator. Use it to join two strings. The formula ="United"&" States" would produce the output United States. Notice the space before States. You can use the CONCATENATE function as an alternative to the & operator.
Reference Operators
Last are the reference operators, which help you work with cell references. They are : and ,. The : is used in the creation of a range. A1:B2 would contain A1, A2, B1, and B2. The , joins multiple references. An example of this would be A1:B2,C1:D2.
Named Ranges
You can create names to refer to ranges of cells to make them easier to use and remember. Named ranges were not used in the example spreadsheet for this page as they are a more advanced technique. However, this post discusses what they are and how to use them.

Sharing Your Creation
Now you can share your creation with the world, or at least with a coworker. Google Sheets offers robust sharing options. Let’s discuss them so you can choose the best option for you.